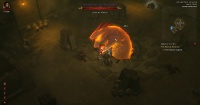
Deserted Cellar
The Deserted Cellar can appear in 2 possible locations on the east side of the Black Canyon Mines in the deserts of Act II. It can present three different scenarios.
It could be the setting of a ritual that breaks out as you approach and a unique Hurax launches himself at you or it could contain and ram-shackled tent in the far corner where a girl, Larra, hides underneath or finally, Graveljaw the Devourer (a Rockworm) could break through the floor to attack you leaving an entranceway to the Tunnels of the Rockworm.
Areas and Dungeons within Deserted Cellar
Access to Levels
Farming for the Deserted Cellar
[e]
- From the Quest Selection screen take Act II quest No. 2. The Road to Alcarnus.
- Take the Waypoint in the Hidden Camp to the Black Canyon Mines.
- Once you have materialised take a couple of steps to the right. If you see the Blood Cellar door open leave the game and resume as the Deserted Cellar won't appear.
- If the Blood Cellar is not there head left and hug the bottom of the map.
- Within a very short distance is the first possible location of the Deserted Cellar.
- If not there head directly north. At the very north, right hand side of the gate into the Stinging Winds is the other possible spawn location.
- If the Deserted Cellar doesn't appear in either place or it doesn't contain what you're looking for, leave and Resume Game to appear back at the waypoint in the Hidden Camp.
Special Monsters found in Deserted Cellar
Notable NPCs
- Larra - (required for Market Research achievement)
- Survivor
Associated Achievements
Deserted Cellar is in some way involved in the following achievement(s).
| Name | Points | Description | Banner |
|---|
Gallery
Graveljaw the Devourer breaks through the floor of the Deserted Cellar
| Sanctuary[e] Act 1 Act 2 Act 3 Act 4 Act 5 |
|---|
| Act 1 | [e] | ||||
|---|---|---|---|---|---|
|
Char. Level: 1 - 20 |
Khanduras |
• The Old Ruins (m) | |||
| (X) = Typical character level for that area - (m) = Map of area | |||||
| Act 1 categories: Dungeons Settlements Structures Maps |
|---|
|
Bonus Areas Cemetery of the Forsaken Fields of Misery |
Festering Woods Leoric's Hunting Grounds |
The Old Ruins Old Tristram Road |
[e]
• The Royal Crypts (m) Wortham Southern Highlands |
|
Blank for now. Maps are the small (m)s |
[e] |
| Act 2 | [e] | ||||
|---|---|---|---|---|---|
|
Char. Level: 12 - ? |
Kehjistan |
||||
| (X) = Typical character level for that area | |||||
| Act 2 categories: Dungeons Settlements Structures Maps |
|---|
|
Kehjistan |
[e] |
|
Caldeum |
[e] |
|
Blank for now. Maps are the small (m)s |
[e] |
| Act 3 | [e] | ||||
|---|---|---|---|---|---|
|
Char. Level: ? - ? |
Dreadlands |
|
|
||
| (X) = Typical character level for that area | |||||
| Act 3 categories: Dungeons Settlements Structures Maps |
|---|
| [e] |
|
Bash |
Cleave |
Frenzy |
[e] |
|
Bash |
Cleave |
Frenzy |
[e] |
|
Bash |
Cleave |
Frenzy |
[e] |
| Act 4 | [e] | ||||
|---|---|---|---|---|---|
|
Char. Level: ? - ? |
' |
| |||
| (X) = Typical character level for that area | |||||
| Act 4 categories: Dungeons Settlements Structures Maps |
|---|
|
Bash |
Cleave |
Frenzy |
[e] |
|
Bash |
Cleave |
Frenzy |
[e] |
|
Bash |
Cleave |
Frenzy |
[e] |
|
Bash |
Cleave |
Frenzy |
[e] |
| Act 5 | [e] | ||||
|---|---|---|---|---|---|
|
Char. Level: 60 - ? |
Khanduras |
||||
| (X) = Typical character level for that area | |||||
