Difference between revisions of "The Broken Blade"
(quest objectives in brief) |
m |
||
| Line 20: | Line 20: | ||
Take the [[Waypoint]] in [[Tristram]] to the [[Fields of Misery]]. Leah will accompany you. The yellow arrow on the minimap will guide you to the northeast of the Fields of Misery and the [[Drowned Temple]]. | Take the [[Waypoint]] in [[Tristram]] to the [[Fields of Misery]]. Leah will accompany you. The yellow arrow on the minimap will guide you to the northeast of the Fields of Misery and the [[Drowned Temple]]. | ||
| − | + | Just before reaching the [[The Old Mill]] you will be approached by the [[Scoundrel]] who will ask you to help him rescue his friend ([[Sasha]]) who thieves are trying to kill and take a relic from. Once you have killed the thieves [[Nigel Cutthroat]] will appear. Kill him to complete this part. | |
| − | At this point Sasha will give the relic to the Scoundrel who asks to join you. Lead him to the waypoint to the north at which point you may take him as your follower if you wish | + | At this point Sasha will give the relic to the Scoundrel who asks to join you. Lead him to the waypoint to the north at which point you may take him as your follower if you wish. |
| − | Nearby the Waypoint is [[Alaric]] the guardian of the temple. He will raise a bridge for you to cross to the [[Festering Woods]]. | + | Nearby the Waypoint is [[Alaric]] the guardian of the temple. He will raise a bridge for you to cross to the [[Festering Woods]]. Alaric wants you to retrieve the [http://diablonut.incgamers.com/item/beacon-of-honor Beacon of Honor] from the [[Warrior's Nest]] and the [http://diablonut.incgamers.com/item/beacon-of-light Beacon of Light] from the [[Crypt of the Ancients]]. |
| − | The entrances to both of these are round about the same place every time in the [[Festering Woods]] ([[Festering_Woods_map|map]]). Those dungeons are small and it's easy to retrieve both Beacons | + | The entrances to both of these are round about the same place every time in the [[Festering Woods]] ([[Festering_Woods_map|map]]). Those dungeons are small and it's easy to retrieve both Beacons. |
| − | Once retrieved head back to Alaric and place the Beacons on the pedestals nearby him. | + | Once retrieved head back to Alaric and place the Beacons on the pedestals nearby him. With the Beacons placed the entrance down to the [[Drowned Temple]] behind Alaric will open. |
| − | Not far into the temple you'll have to fight one champion [[Ezek the Prophet]] and then three unique monsters [[Karel]], [[Larel]] and [[Moek]]. All are melee attackers, however, they do summon skeletal archers regularly during the encounter | + | Not far into the temple you'll have to fight one champion [[Ezek the Prophet]] and then three unique monsters [[Karel]], [[Larel]] and [[Moek]]. All are melee attackers, however, they do summon skeletal archers regularly during the encounter. Speak again with Alaric. |
| − | He'll open the way to meet [[Maghda]]. She sets about half a dozen [[Dark Zealot]]s on you and once they are dead she will disappear leaving the glowing sword shard behind, which you take to [[The Stranger]] in [[Tristram]] | + | He'll open the way to meet [[Maghda]]. She sets about half a dozen [[Dark Zealot]]s on you and once they are dead she will disappear leaving the glowing sword shard behind, which you take to [[The Stranger]] in [[Tristram]]. |
You then head to [[Wortham]] by using the Ferry positioned on the western edge of Tristram on a new quest - [[The Doom in Wortham]] | You then head to [[Wortham]] by using the Ferry positioned on the western edge of Tristram on a new quest - [[The Doom in Wortham]] | ||
| Line 41: | Line 41: | ||
{| | {| | ||
| | | | ||
| − | *Go to the [[Drowned Temple]]. | + | *Go to the [[Drowned Temple]]. '''<nowiki>*</nowiki>''' |
*Follow the [[Scoundrel]]. | *Follow the [[Scoundrel]]. | ||
*Talk to the [[Brigand]]s. | *Talk to the [[Brigand]]s. | ||
*Kill the Brigands. | *Kill the Brigands. | ||
*Speak with the Scoundrel. | *Speak with the Scoundrel. | ||
| − | *Take the Scoundrel north to the waypoint. | + | *Take the Scoundrel north to the waypoint. '''<nowiki>*</nowiki>''' |
*Talk to [[Alaric]]. | *Talk to [[Alaric]]. | ||
| − | *Go | + | *Go to the [[Festering Woods]]. '''<nowiki>*</nowiki>''' |
| − | *Retrieve the Beacon of Light from the [[Crypt of the Ancients]]. | + | *Retrieve the Beacon of Light from the [[Crypt of the Ancients]]. '''<nowiki>*</nowiki>''' |
| | | | ||
| − | *Retrieve the Beacon of Honor from the [[Warrior's Rest]]. | + | *Retrieve the Beacon of Honor from the [[Warrior's Rest]]. '''<nowiki>*</nowiki>''' |
*Place the Beacons on the Pedestals. | *Place the Beacons on the Pedestals. | ||
| − | *Enter the [[Drowned Temple]]. | + | *Enter the [[Drowned Temple]].'''<nowiki>*</nowiki>''' |
*Explore the Temple. | *Explore the Temple. | ||
| − | *Kill [[Ezek the Prophet]] and the skeletons. | + | *Kill [[Ezek the Prophet]] and the skeletons.'''<nowiki>*</nowiki>''' |
*Talk to Alaric in the Drowned Temple. | *Talk to Alaric in the Drowned Temple. | ||
*Secure the Glowing Sword Shard. | *Secure the Glowing Sword Shard. | ||
| − | * | + | *Return the Glow Sword Shard to [[New Tristram]].'''<nowiki>*</nowiki>''' |
|} | |} | ||
| + | '''<nowiki>*</nowiki>''' [[Checkpoint]] reached around this stage in the quest. This means you can quit out and '''Resume''' your game at a later date and begin at this point - in effect it's a Save Game point. | ||
| Line 69: | Line 70: | ||
{{achievement header}}<achievement type="single">The Last of the Horadrim</achievement> | {{achievement header}}<achievement type="single">The Last of the Horadrim</achievement> | ||
| − | == | + | <!-- |
| + | ==Trivia and Easter Eggs== | ||
| + | |||
| + | ==Strategy and Tips== | ||
| + | --> | ||
| + | |||
| + | ==Media== | ||
<gallery> | <gallery> | ||
Revision as of 00:53, 13 November 2012
The Broken Blade is an Act I quest in Diablo III.
Contents
Quest Information
- Initiated by: Leah
- Pre-requisite: Sword of the Stranger
- Required to progress? Yes
- Reward(s): Gold/ Experience/ Scoundrel
- Lore items: ?
- Related Achievements: The Last of the Horadrim.
- Leads to: The Doom in Wortham.
The Broken Blade Walkthrough
Take the Waypoint in Tristram to the Fields of Misery. Leah will accompany you. The yellow arrow on the minimap will guide you to the northeast of the Fields of Misery and the Drowned Temple.
Just before reaching the The Old Mill you will be approached by the Scoundrel who will ask you to help him rescue his friend (Sasha) who thieves are trying to kill and take a relic from. Once you have killed the thieves Nigel Cutthroat will appear. Kill him to complete this part.
At this point Sasha will give the relic to the Scoundrel who asks to join you. Lead him to the waypoint to the north at which point you may take him as your follower if you wish.
Nearby the Waypoint is Alaric the guardian of the temple. He will raise a bridge for you to cross to the Festering Woods. Alaric wants you to retrieve the Beacon of Honor from the Warrior's Nest and the Beacon of Light from the Crypt of the Ancients.
The entrances to both of these are round about the same place every time in the Festering Woods (map). Those dungeons are small and it's easy to retrieve both Beacons.
Once retrieved head back to Alaric and place the Beacons on the pedestals nearby him. With the Beacons placed the entrance down to the Drowned Temple behind Alaric will open.
Not far into the temple you'll have to fight one champion Ezek the Prophet and then three unique monsters Karel, Larel and Moek. All are melee attackers, however, they do summon skeletal archers regularly during the encounter. Speak again with Alaric.
He'll open the way to meet Maghda. She sets about half a dozen Dark Zealots on you and once they are dead she will disappear leaving the glowing sword shard behind, which you take to The Stranger in Tristram.
You then head to Wortham by using the Ferry positioned on the western edge of Tristram on a new quest - The Doom in Wortham
Objectives in Brief
|
|
* Checkpoint reached around this stage in the quest. This means you can quit out and Resume your game at a later date and begin at this point - in effect it's a Save Game point.
Achievements
The Broken Blade quest forms part of the following Achievement
| Name | Points | Description | Banner |
|---|
Media
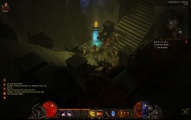
Waypoint in the Drowned Temple
Scoundrel offers his services
Alaric raises a bridge
Brother Karel with Knockback
Brother Larel with Molten
Brother Moek with Fast
| Quests & Events of Diablo III [e] Act I Act II Act III & Act IV Act V |
|---|


